How to create and manage Users Groups
For better user management, Administrators can create Users Groups. This will allow users to be included in one or more groups and thus carry out certain actions in the system that only apply to certain users. Let’s see how to do it.
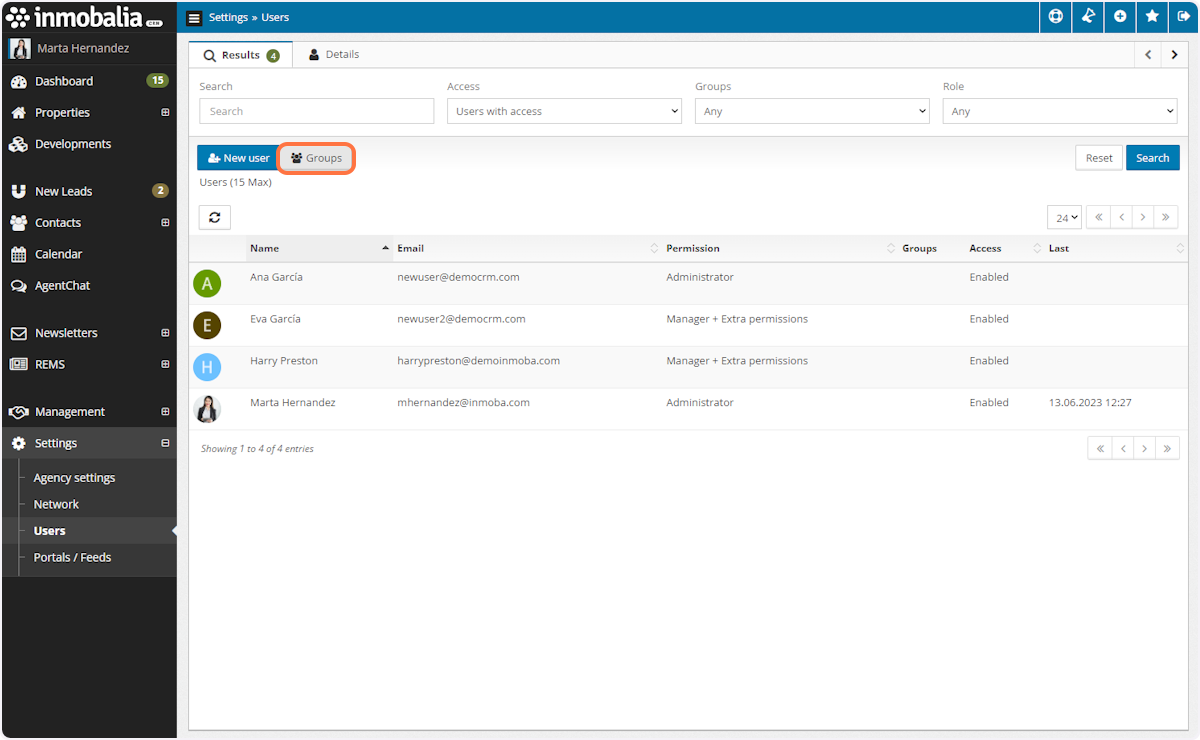
A. Go to Settings section and click on Users.
B. Click on Groups
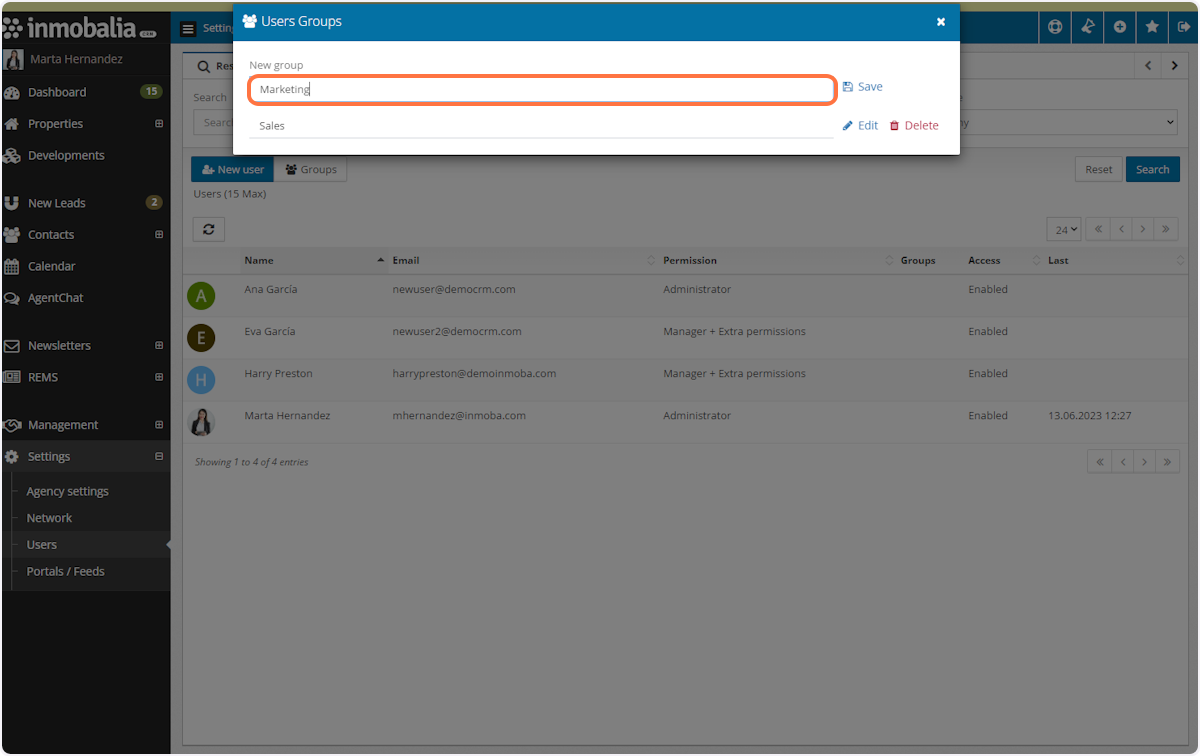
C. Type the name of the Group and Save it
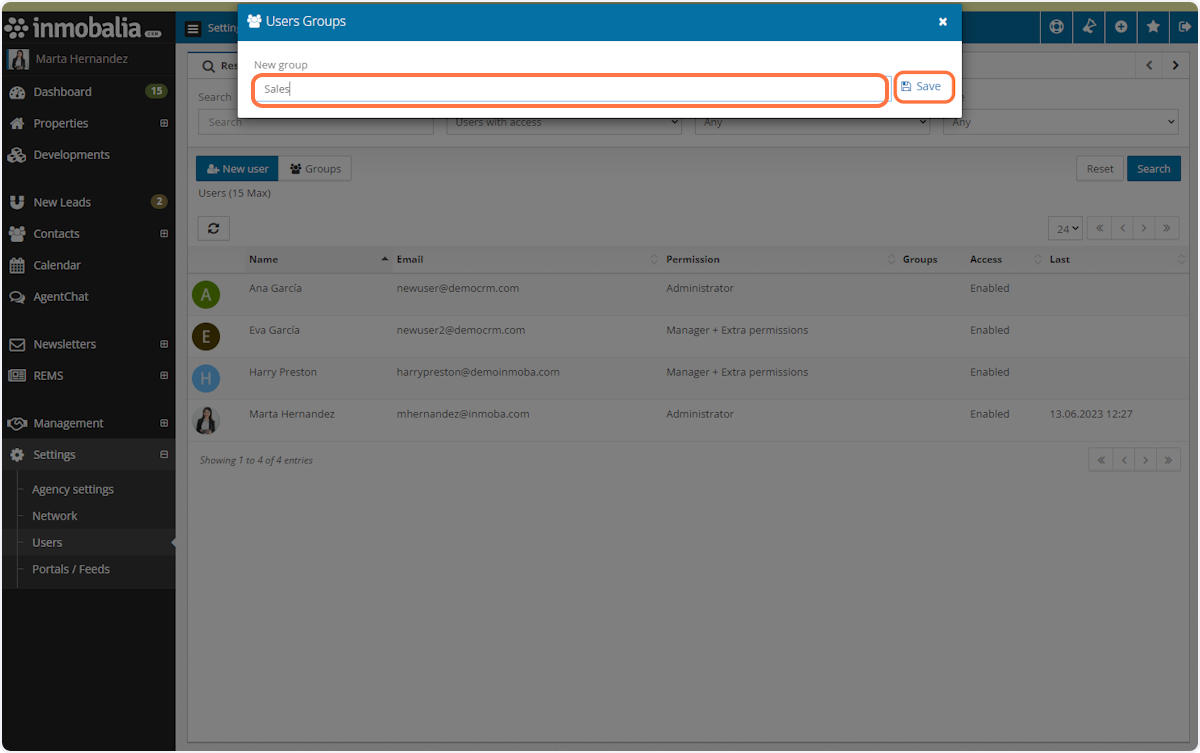
D. You can create as many Groups as you need
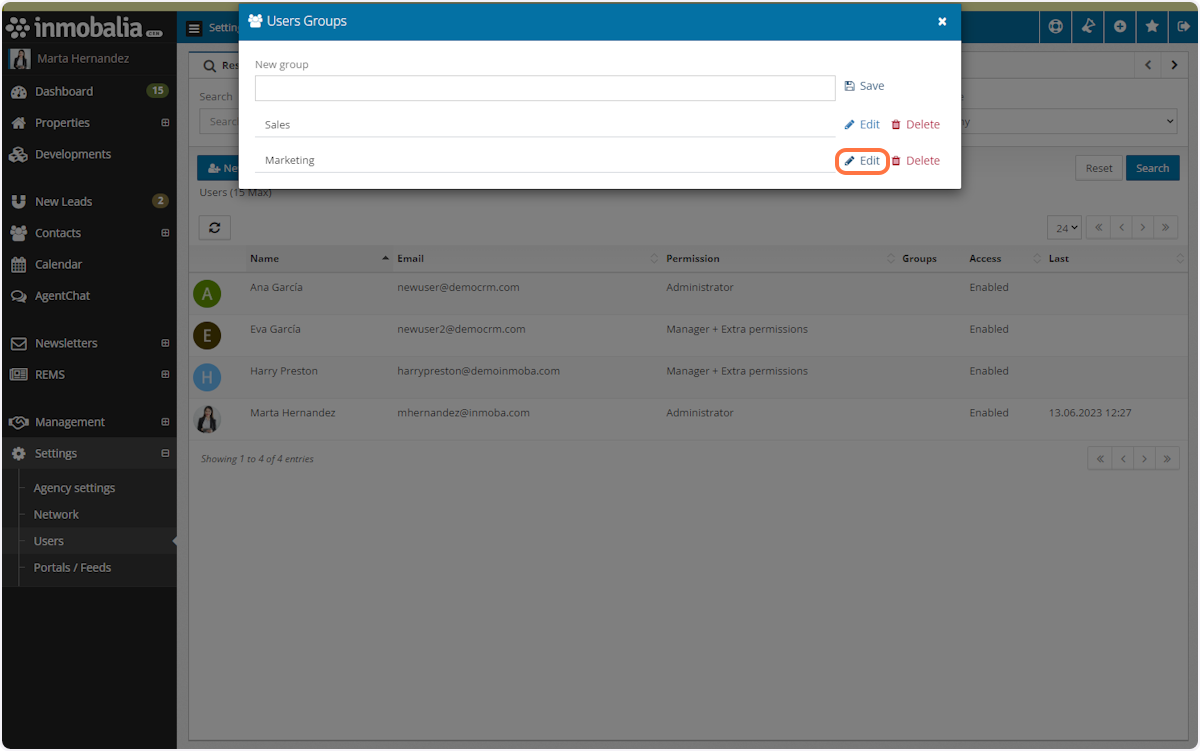
E. If you need to modify the name of the Group, click on Edit and save the changes
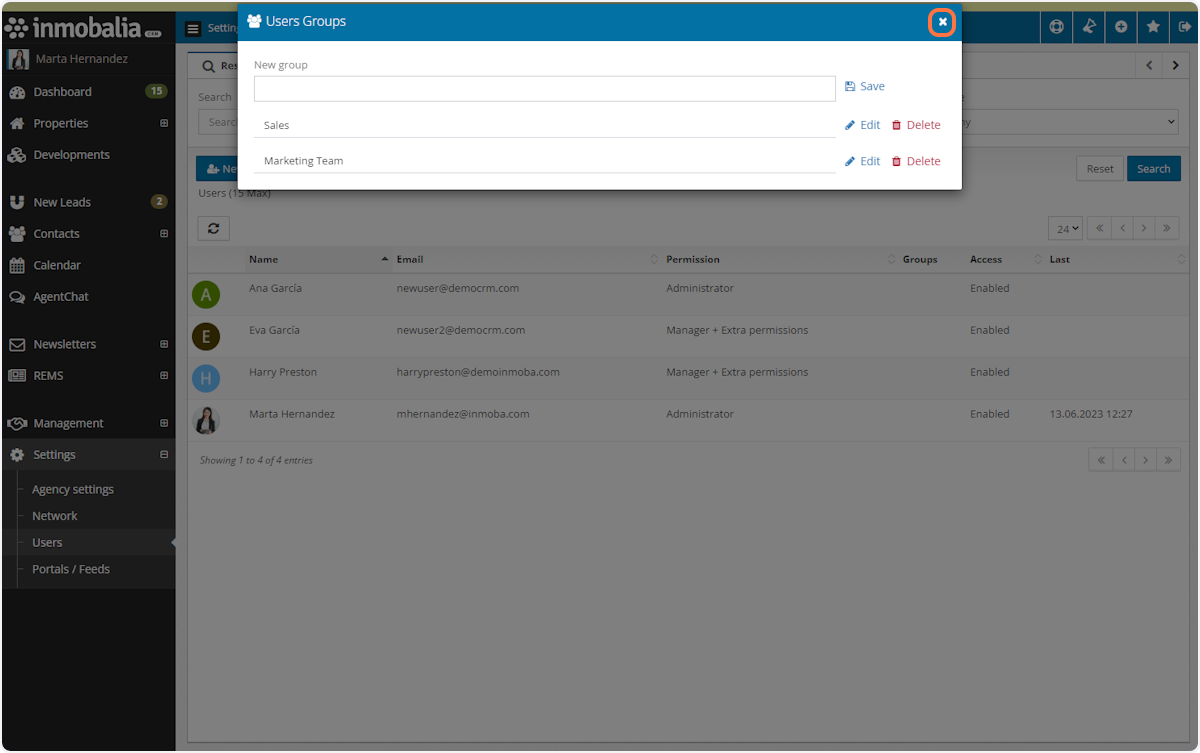
F. Close the Users Groups window
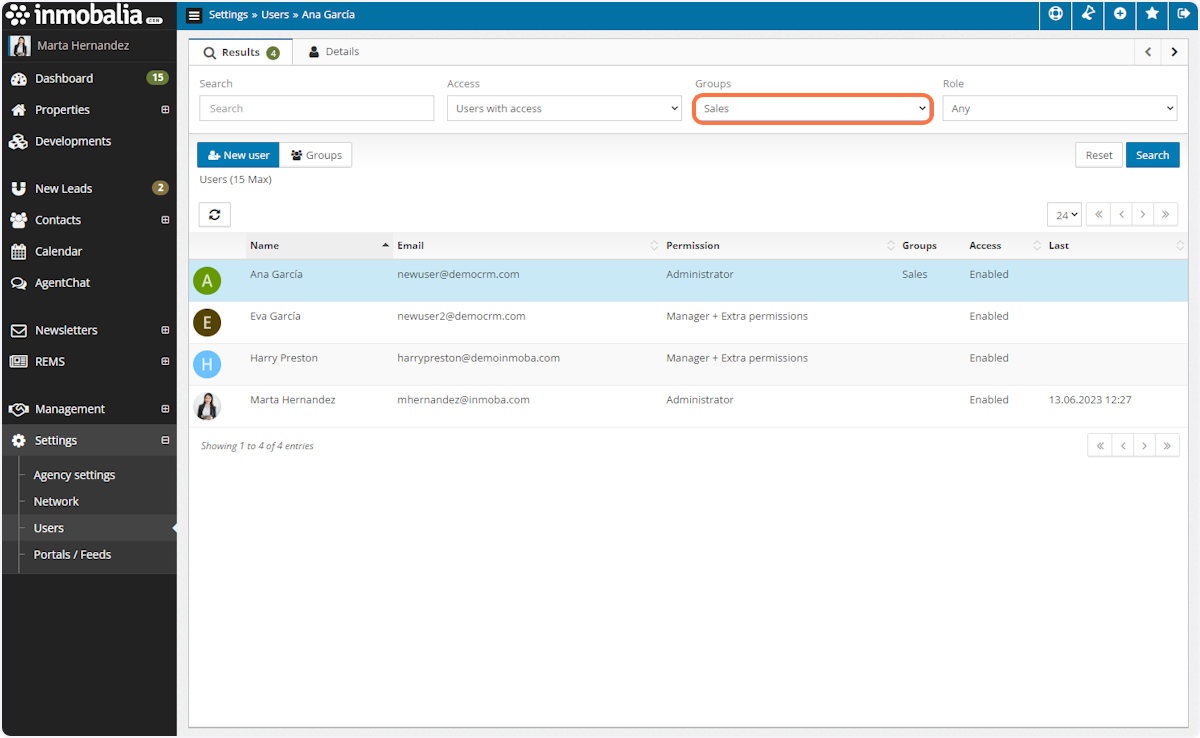
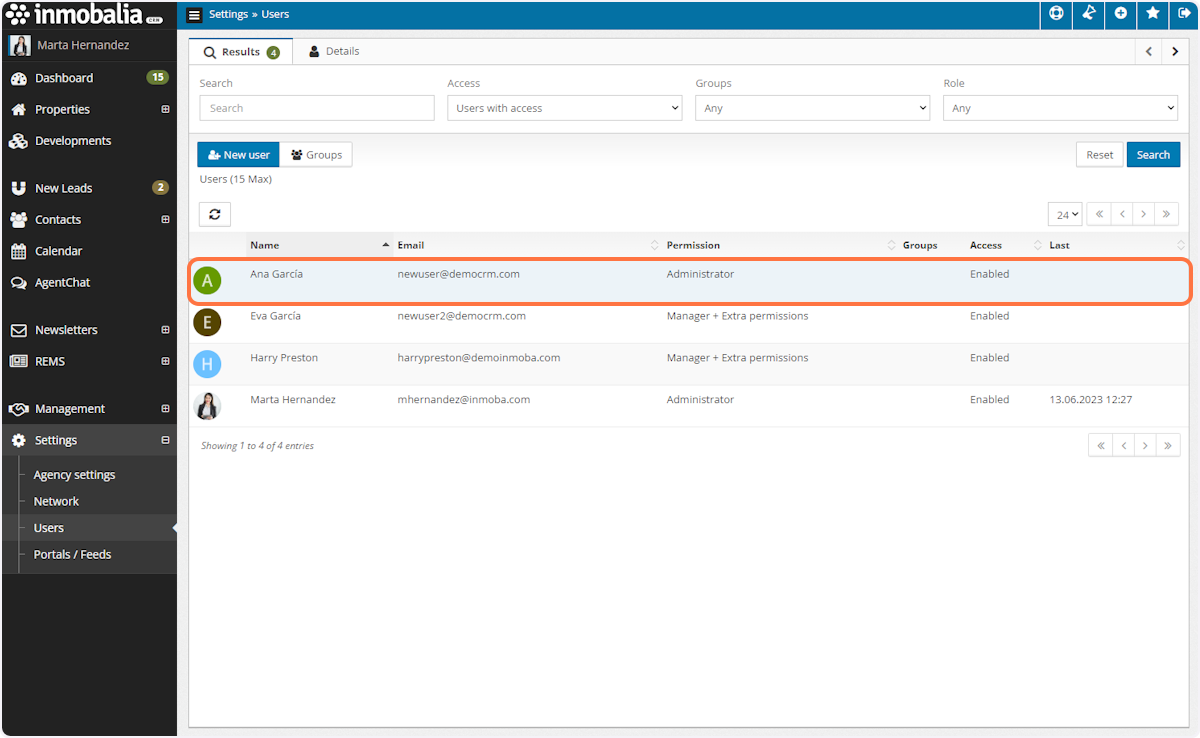
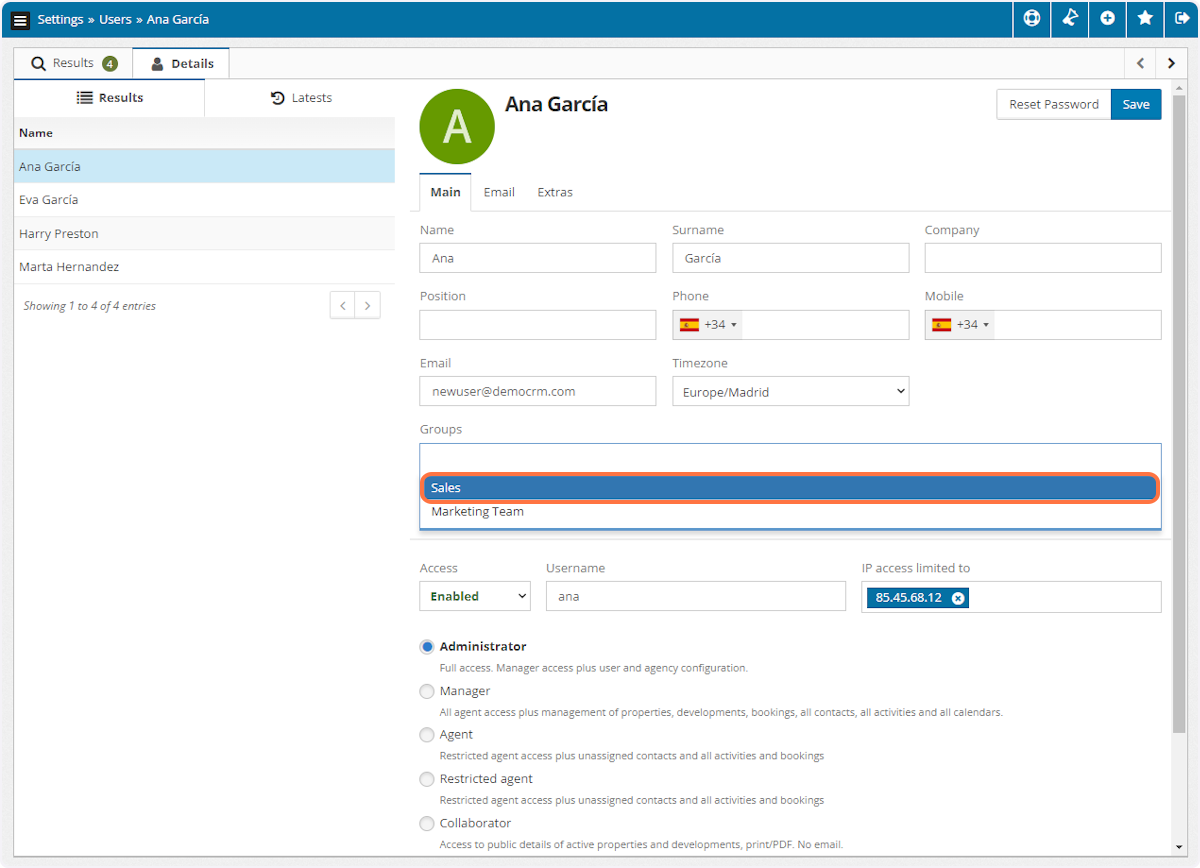
G. Back in the Users list click on any of the users if you want to include him/her in a Users Group
H. Go to Groups and select the group from the drop-down list
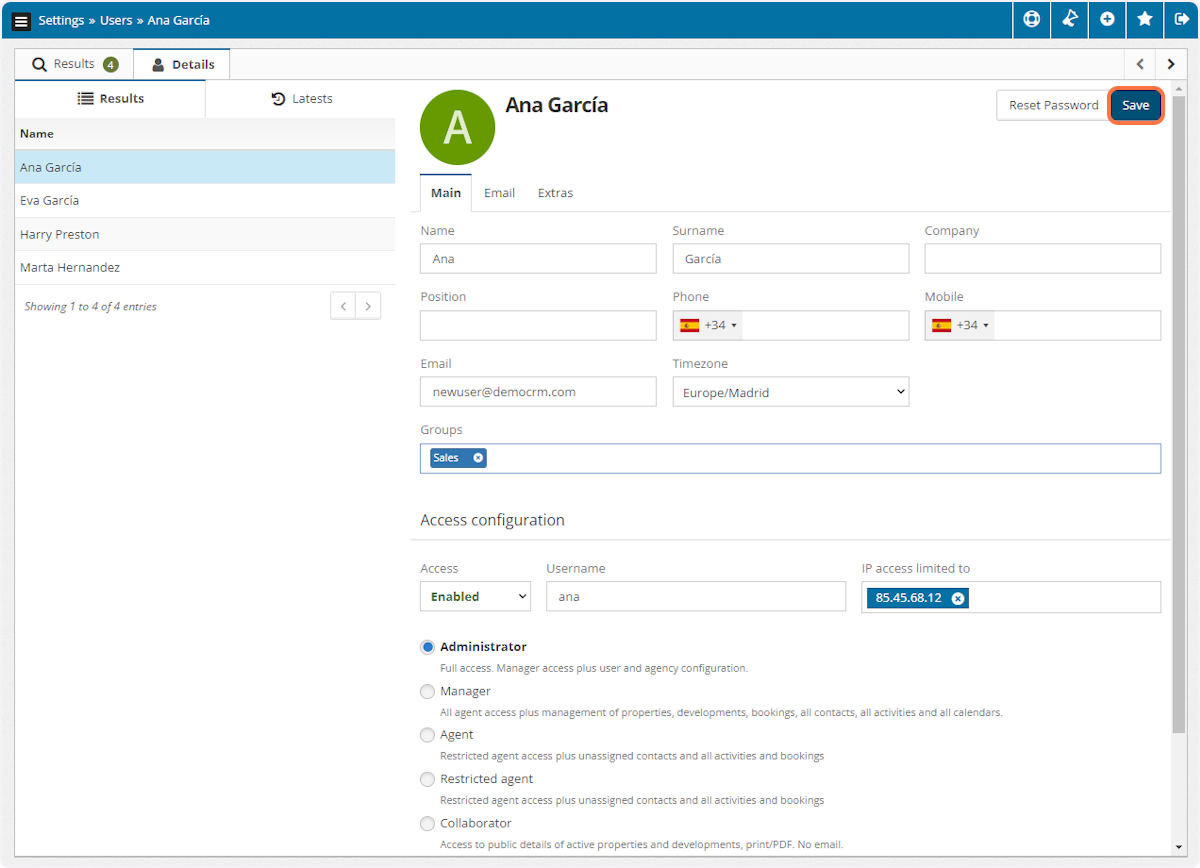
I. Click on Save
J. Back in the Users list you can use the Groups filter to find all the members of a Users Group.